How To Pack A Cooler: The Ultimate Guide to Packing a Cooler
We all bring our coolers with us when camping and other outdoor adventures. But the adventure becomes a sad one when we find out that all the ice in the cooler has melted and our food has soaked up with water.
One of the crucial reasons behind this could be the improper packing of the cooler. Another reason could be the temperature. Well, we cannot control the weather and temperature, but we certainly can control the way we pack a cooler.
Depending on your cooler packing method, it can surely last for longer and keep your food and beverage cool and chilly.
So let us take a look at how you can pack a cooler.
How do you pack ice in a cooler?
- Use a high-quality cooler
- Pre-chill the cooler
- Pre-chill the food
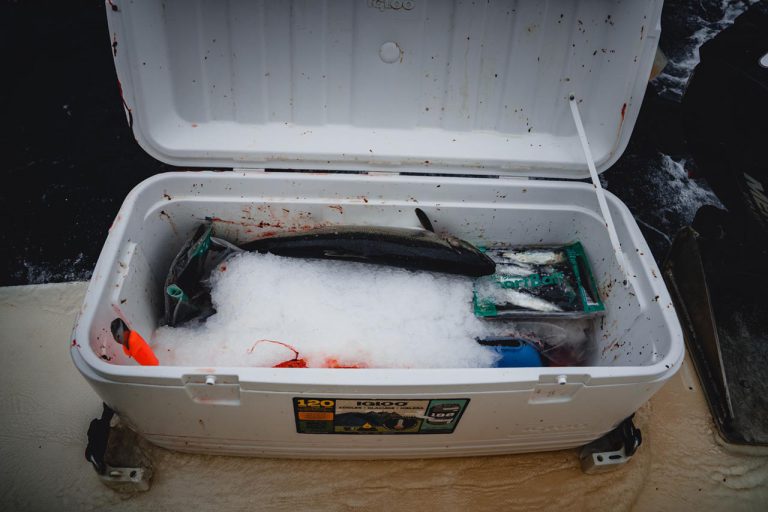
- Lay a foundation of ice at the bottom
- Pack in chronological order
- Make layers of ice
- Fill the gap with ice cubes
- Use trays and containers to segregate
There are lots of things to consider when packing a cooler. It is not as simple as opening it up, throwing some ice, throwing your food, and packing it. There is more to that. Packing your cooler starts from the day before you put ice in the cooler.
Let us go through the steps.
1. Choose the right cooler
You might have already known that there are different types of coolers that perform differently. Based on your needs and budget, choose the right one. Usually, bigger hard shell coolers hold more ice and last longer.
Also, make sure to choose a light color cooler. A lighter color reflects sunlight so they don’t heat up easily in comparison with dark color coolers.
A few coolers we recommend are the Yeti Tundra, Pelican, and Engels cooler. Not only that they’re great at insulation, but they are also spacious and can be equipped with accessories.
I personally use a YETI Tundra 45 for short camping trips. I just found them to have excellent ice retention and just a very reliable cooler overall. You can get them on Amazon
(Related: How to choose the right YETI cooler size for you)
2. Pre-chill the cooler
The first thing you should do now is to pre-chill the cooler. Before the day of taking it out or at least 12 hours before use, put the cooler in your freezer.
In case the cooler is too big for your freezer, at least put it in an airconditioned room or fill in the cooler with tap water (room temperature or cold) and put two or three ice bags in there and leave it for 12 hours or less.
It will cool down the cooler and it will increase the time it stays cool.
(Related: How to keep drinks cold in cooler without ice)
3. Pre-chill the food
Just like the cooler, the food needs to be pre-chilled too. But before doing that, prepare the food. Your goal is to do most of the work at home rather than at the campsite.
To save space in the cooler, take out the food from its original packet and put it in a more compact packet. Take the food and ingredients that you will use.
Now freeze the food in your home freezer. This will ultimately help the cooler to last longer in the long run.
4. Lay a nice foundation on the bottom
One of the secrets of keeping a cooler cool for a long time is to lay a nice foundation at the bottom of its inside. It will create a cold base for the ice cubes. The base will keep the ice-cold for a much longer time.
The best option is to use a dry ice brick. It will last longer. But for average weekend trips, you can use regular ice bricks or reusable freezer packs. They will suffice for one to two days.
Lay the ice brick/ reusable freezer pack at the bottom and cover it with a thin layer of ice cubes. Then start packing it with food.
5. Pack in a chronological order
Always pack your food in order. Follow the first in, last out method. In this method, pack the last thing you will eat at the bottom. For example, say you are planning to have a steak on the last day of camping. So put the raw steak in the cooler first. That means it will go at the bottom and to get there you will have to consume the ones that are placed on top of that.
Remember to use airtight containers for them. It is wise to bag items that will be used together. It will reduce the cooler open time.
6. Make layers
Make layers between items. For example, store the stake at the bottom of the freezer. Then put some ice cubes on it and spread them to make a thin layer. Then put the next item on it and then repeat the process.
It will help the items in the cooler to get an even cool distribution. Also, make sure that the layers are thin. Otherwise, you may find a lack of space for storage.
7. Fill the gaps with ice cubes
A cooler is not like your regular freezer where you can put items and leave space between them. Unlike your regular home freezer, your cooler does not have any access to unlimited cooling power. It has to rely on the energy of the ice stored in it. With that ice, it will cool the stored food in it.
So we cannot let any of this energy get wasted on unnecessary cooling. That is why we cannot leave air gaps between the stored foods in it. The ice will use energy to cool that air and melt. So, put ice cubes on those small gaps.
You can shuffle your beverage and ice cubes to properly cover all the gaps. Now that all the energy is used in cooling your food, it will last for longer.
And that wraps up all the steps for properly packing your cooler for long trips. You will be surprised to see how significantly the performance of your cooler will change after following these steps. Better preparation always leads to satisfying results.
Also, don’t forget to clean the cooler properly after returning from your adventure. It will help to prepare it for the next adventure. In the meantime, you can use that as a storage place for your camping gear.
8. Use trays and containers
Organize your food by placing them on trays and containers. This will help segregate the contents of the containers as well as prevent them from getting wet when the ice melts.
Most rotomolded coolers sell some sort of accessories like trays to help segregate the cooler. Here are a few that you can get on Amazon.
FAQ
Do you put ice on the top or at the bottom of the cooler?
You can put ice on both the top and the bottom. But always remember to put a solid ice brick to construct the base layer. You can ignore putting ice on the top. It won’t affect much. But do not forget to put the ice on the bottom.
Putting one or a few ice bricks (enough to cover the full bottom)on the bottom will create a cold basement for the ice cubes at the top. Those ice cubes can funnel energy/cold from that ice brick and last for a longer period.
You can boost that performance more by putting more ice, perhaps an ice brick, at the top of all stored food. It will increase the energy level of the cooler.
But don’t put ice on the top only. Every time you open the cooler, the ice on the top will melt. As there is no bottom ice foundation, those waters will soak up all the foods below.
So it doesn’t matter if you put ice on top of all foods or not. Be sure to put one at the bottom.
How do you keep the cooler colder for longer?
There are a handful of tips for keeping your cooler colder for longer. The first one begins right when you purchase one. Always buy a cooler with light color. White color coolers can stay cooler for the longest under bright sunlight because the color reflects sunlight. As a result, less heat is transferred.
But if you don’t have a white or light color cooler, you can use other methods of achieving similar results. Cover your dark-colored cooler with a light-colored towel. It will work with the same principle.
Another thing you can do is put dry ice blocks at the bottom and create a foundation. Dry ice stays cool for the longest. As it will be the basement, the ice cubes on the middle and top will funnel energy from it and stay cool.
One more thing you can and should do is decrease the time you keep the lid open. The more you keep the lid open, the more heat enters the cooler. So try to minimize the lid open time as much as you can.
To minimize lid open time, you can put the same items together. For example, put all the beverages like soft drinks and beers together in a bag. That way, you know exactly where to get the beverages instead of trying to find the inside.
How can you keep the ice cubes from melting?
There is a scientific way to do that and that is adding salt to the ice cubes. It won’t drastically change the result but apart from the dry ice foundation, it is the best you can do.
Salt helps water maintain a cooler temperature without freezing. So when they are frozen, they stay cool for longer. The melted water will also have a cool temperature and hence take less energy from the remaining ice.
Conclusion
It is pretty easy to pack your cooler properly and make it last longer in the journey. So follow the steps and use some other tips like putting a cold towel on top of it to make it stay even cooler. All this will add up to a nice camping adventure with fresh and cold beverages until the end of your adventure.